Installing a Window A/C in a Sliding Window
Context
I am renting an apartment that has these horizontally sliding windows, installed near the floor. I wanted to go for a window A/C as they keep the loud and hot condenser unit outside, and are generally cheaper than the portable hose-type units. They also take up less floor space which is important for my small bedroom. Technology Connections on YouTube has a good video speaking on the inefficiencies of portable A/C units here.
There are window A/C units designed for sliding windows, but they are about as expensive as the portable units. Most window A/C’s also require a window sill, which my windows do not have. I figured if I am going to need to design a workaround, I might as well go with the cheapest option.
My main design considerations are:
- Minimal permanent modifications to the A/C and the apartment.
- Minimal dissassembly required for when I remove the A/C in the winter.
- Some semblance of security as my window is about level with the ground.
I ended up buying a 6000 BTU GE unit, as it was heavily discounted at the time ($140 from $220 MSRP). My bedroom is about 169 SQFT so it should be the appropriate size.
The Design
I am not the first to do this; I found several examples of people making wooden frames that either sit inside the window track or just inside the window frame. I am going to be basing my design mostly off of this video from In The Garage on YouTube, which is the in-the-window-track style. This should satisfy all three options (if I build and design it correctly).
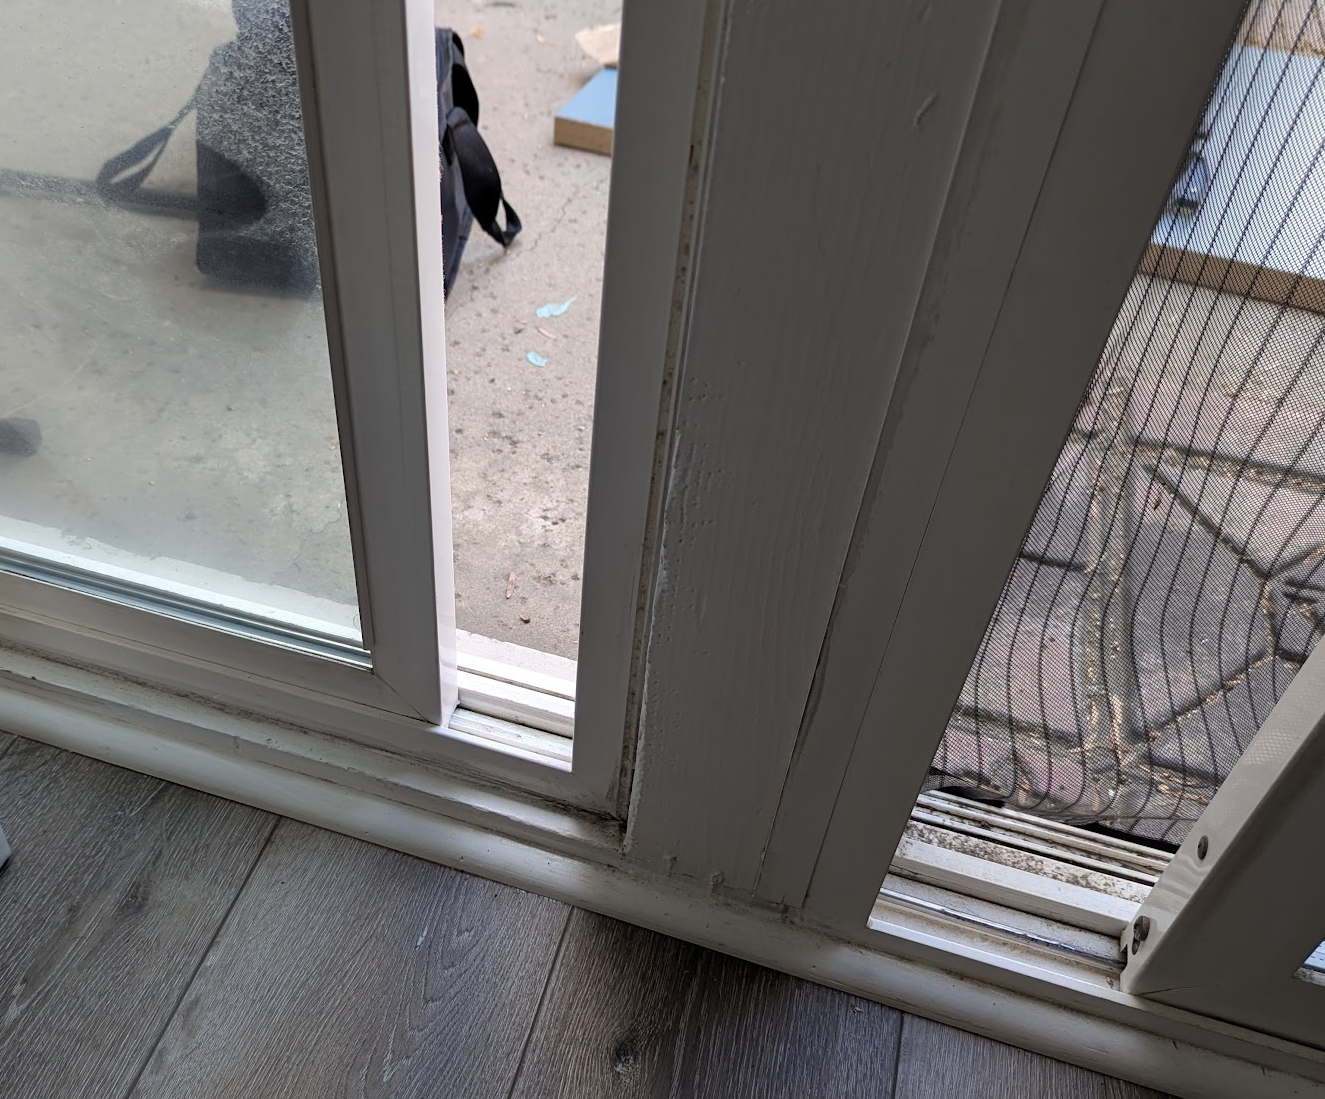
My window opening is 33.5”, and the track is about .375” deep on the bottom, and .75” deep on the top. I will make the frame about 34.25” tall, which should allow me to angle the frame up and in sort of like a window screen. There should be about .375” of play up and down, which I am hoping will let me “close” the frame on the top of the A/C to keep it secure.
I will enclose the top portion of the frame with two pieces of plywood and fill with expanding foam, to hopefully give a little bit more insulation and weatherproofing compared to just one piece of ply.
I am also going to create a mini window sill about the width of the A/C for it to sit on, as the unit I bought comes with some L brackets to secure the unit to a window sill. The sill and frame will need to be kept separate in order to emulate the window closing action of the frame. The weight of the unit should keep the sill secure in the window track.
I drew a mockup in CAD and this is what I am envisioning the frame to look like .

The right side of the track is about .75” deep. The frame should be sitting inside the window frame on 3 sides, and will be secured by closing the window and propping the window shut with a piece of wood inside the track. Ideally, this will prevent anyone from easily removing the A/C from the outside even with the up and down play of the frame. The frame will be contructed with 1x3s and 1/4” plywood so it isn’t the most robust design. If someone is willing to break through the frame it would be just as easy and loud for them to break through a closed window as well, so I don’t feel too unsafe with this solution.
Design Drawbacks
One drawback of this design is that it is not really modular; If I move to another place with sliding windows, I will most likely need to build the frame from scratch. I guess this isn’t a huge concern since it’s only 8 or so pieces of wood.
Another drawback I see is that installation will be a little cumbersome. There is about a .5 inch thick lip on the bottom of the unit that rests against the outside of the window. I’ll have to sit the window on the “sill,” and install the frame after the A/C is in the window. There is also a U-shaped bracket on the top of the A/C where a window would typically come down into. The front of the U is about 1” and the back is about .5”. The .375” of play in the frame isn’t enough to accomodate this, but I might be able to get away with doing some funky angling of the A/C while the frame is going in. The unit is only about 35 lbs so hopefully this doesn’t give me too much trouble. It would probably be easiest to install the frame from the outside, which isn’t really an option if you’re on the second story or higher.
All that being said, I probably won’t be inclined to move the A/C between my bedroom and living room. I guess that’s the convenience of having a portable A/C.
The Build
My woodshop consists of a hand saw, a circular saw, a scrap Ikea table top, and my backyard.
Phase 1
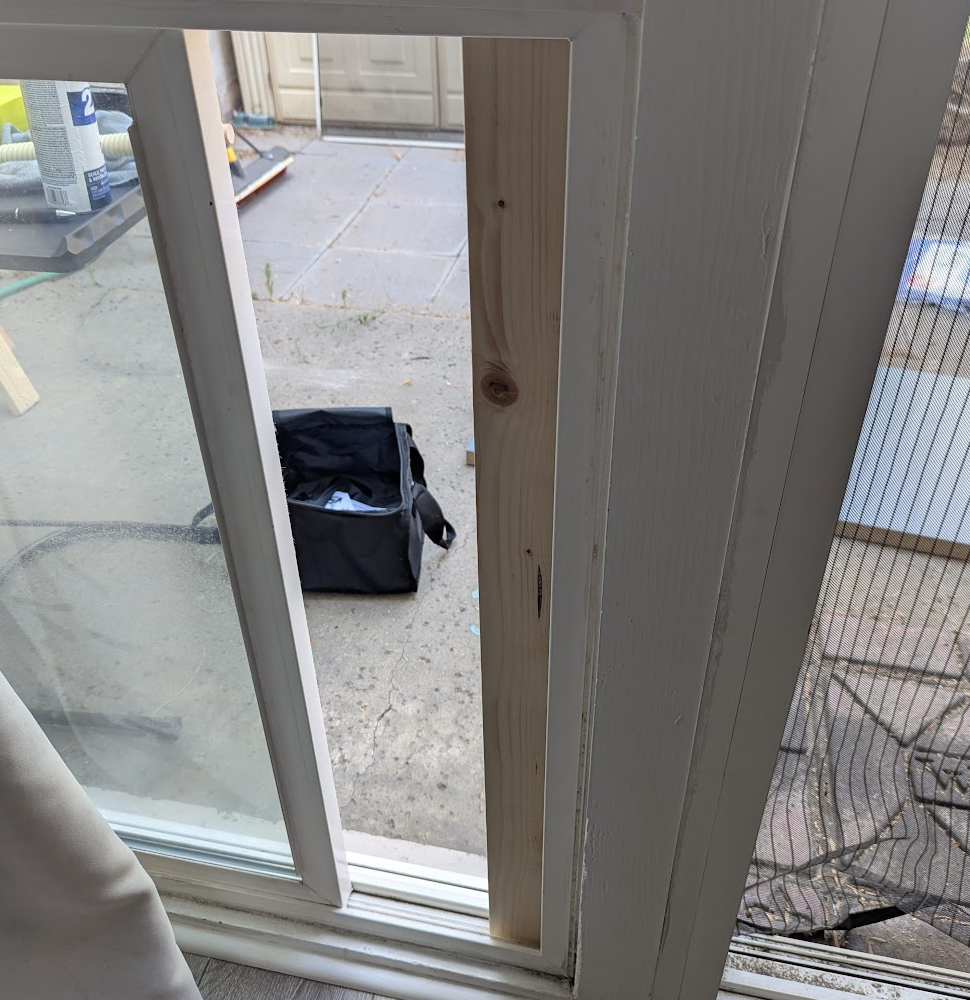
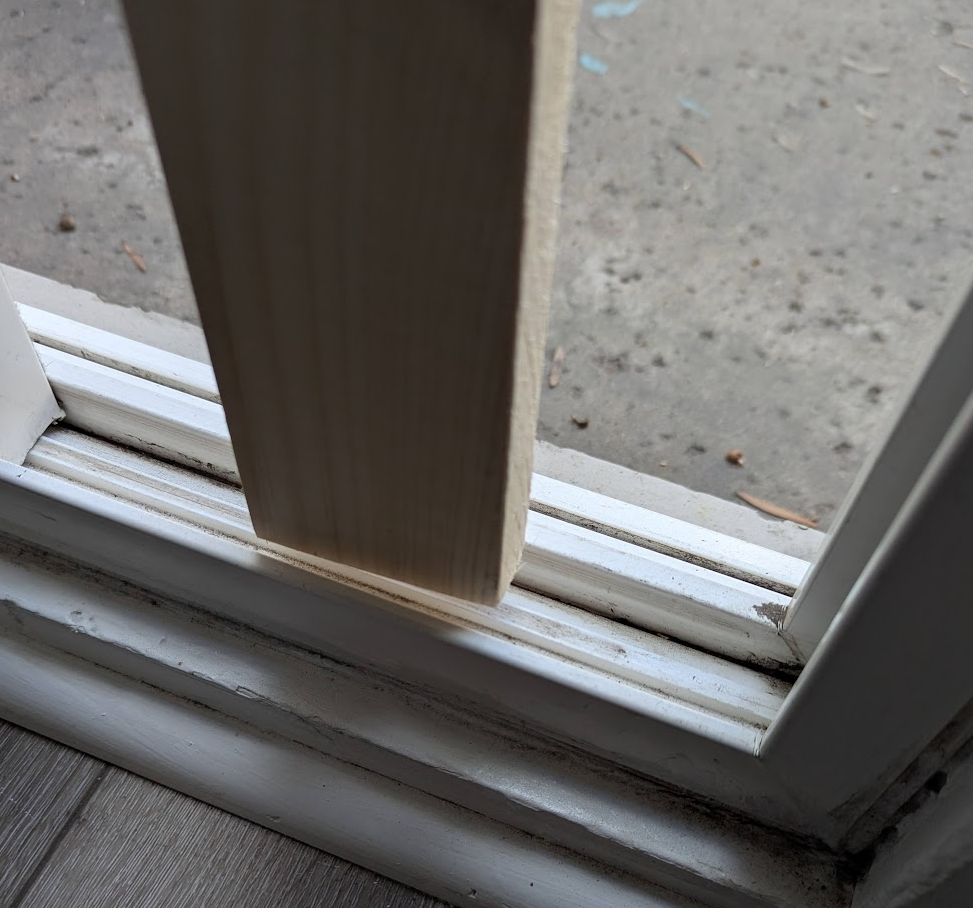
As I write this I am waiting for my A/C to be delivered. I went ahead and cut down a 1x3 to make the vertical members. As I expected, there is about 3/8 of play up and down of the vertical members within the window track. I surprisingly got the fit up pretty good, which is important since I didn’t buy too much extra material for if (when) I mess up a cut. While I wait, I will apply a few coats of clear to the two pieces.
Phase 2
The A/C arrived and I tweaked my dimensions based on some measurements I took off the unit. I ran into a small road block; The faux window sill I made is as far forward as I could get it, but resting the A/C against it tips the unit forward rather than backward, which is not good for operation. Luckily the A/C lip is able to rest inside the window track, and has about 2-3 degrees of back tilt when I fit it up. If needed, I can bend the top lip of the A/C to get a little more tilt back.
I added 1/16” or so to each dimension for some rough tolerancing, but I don’t think I added enough. The frame and A/C fit together almost like a press fit, and getting it wedged into place was as annoying as I imagined. This is sort of good though as it means a would-be burglar cannot easily remove the A/C. I also cannot easily remove the A/C, so I am going to get the rest of the frame together without any more test fitting. There are a few gaps between the frame and A/C that I will have to fill with weather stripping once installed. Before the final phase of building, I am waiting for the clear coat to dry on the two large plywood pieces.
Phase 3
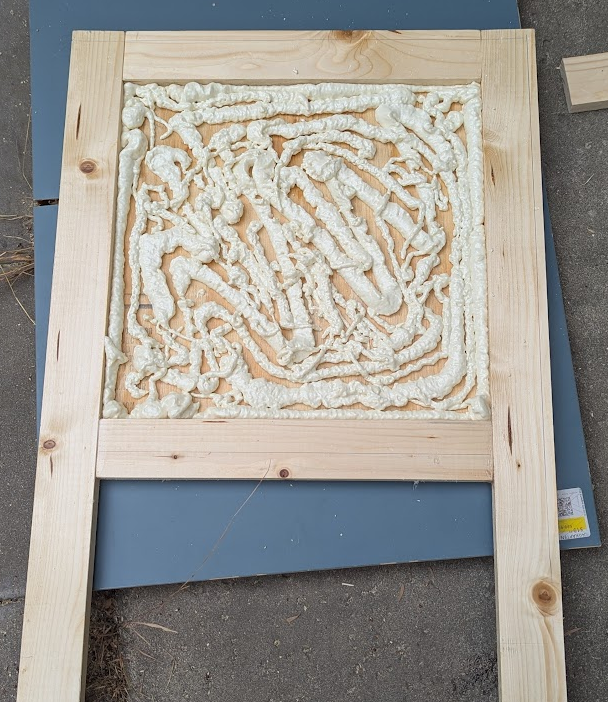
I installed the outward facing piece of ply and filled up the cavity with some foam in a can. It actually expanded way more than I anticipated and I needed to saw it flush with the frame.
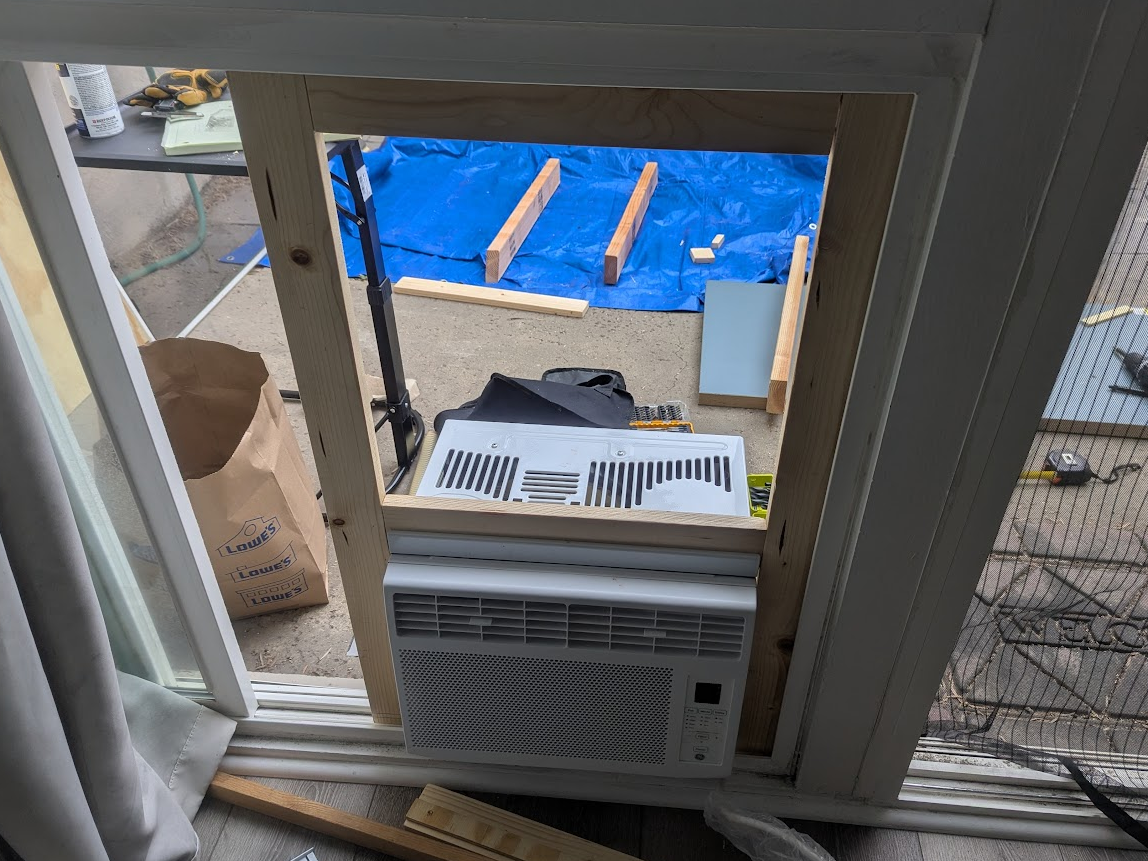
After this, I just had to seal up the cavity and wrangle the frame and A/C into place. Here is how it all looks together.
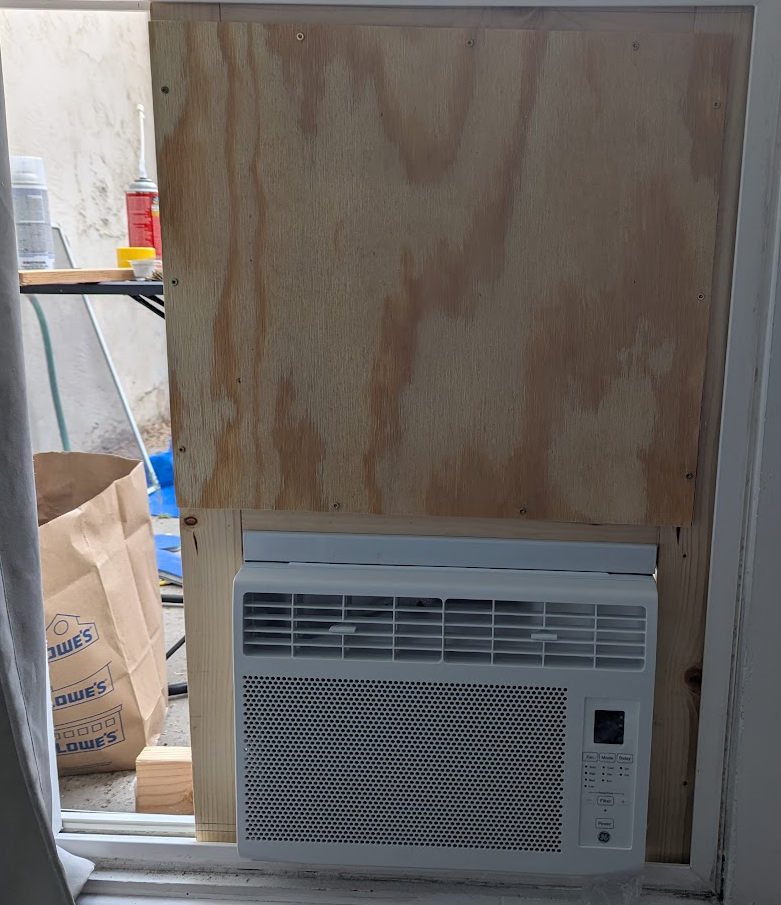
As the frame is slightly less thick than the track depth, I used some scrap plywood to shim the bottoms so they couldnt move out of place. I then tucked some insulating foam into all the spaces to weathertight my setup the best I could.
Closing
This took longer than expected, mostly from having to cure several coats of clear coat and the expanding foam. It has a few imperfections but I am pretty satisfied with the result. I was a little disappointed the faux sill didn’t work out, but honestly having another part in the assembly would probably be a pain in the ass for future me. There is a chance of rain tomorrow, so I should probably go around the edge of the outward facing plywood with a bead of silicone. The days following will be a heat wave, so I got this together just in time.
As I bought basically the cheapest A/C with a remote, you cannot adjust the pitch of the vents. This is sort of a problem as the A/C just blows its cold air onto the floor. I did some quick cardboard and hot glue engineering before bed to prototype an air deflector before I design something more permanent.

There is alot of variance between windows and A/Cs, and there is no real one solution to this problem. If you read through this hopefully this gives you some ideas to incorporate.